
Reviewed · MIYAJIMA TOURS
Hiroshima & Miyajima: UNESCO A-Bomb Dome & Itsukushima with Local
Two islands, one unforgettable morning. This private Hiroshima and Miyajima day pairs Itsukushima Shrine on Miyajima with a careful route through Hiroshima’s Peace Memorial Park and Museum, guided with real human stories, not just facts. The pacing stays flexible, so you can slow down when something hits you.
I love the combination of included entrance tickets (Itsukushima Shrine and the Peace Memorial Museum) and the “get it right once” planning around key sights. I also like that the guides are praised for English and for sharing personal stories passed down through families, including guides named Yuka, Massa, and Ally in prior feedback.
My one caution is practical: it’s a walking-focused tour using public transportation, and lunch is not included. If you have trouble walking long distances, you may want a different format.
Key things to know
- Hotel pickup on foot means you start quickly without hunting for a meeting point
- Order can swap between Miyajima and Peace Park so you have a shot at seeing the Floating Torii at the right moment
- Itsukushima Torii floats with the tide, so timing matters for photos and atmosphere
- Peace Memorial Museum is included, giving you context beyond the monuments
- You pay for transit separately, so plan for the added cost of trains or ferry
Why Miyajima’s Floating Torii Gate timing changes the whole day
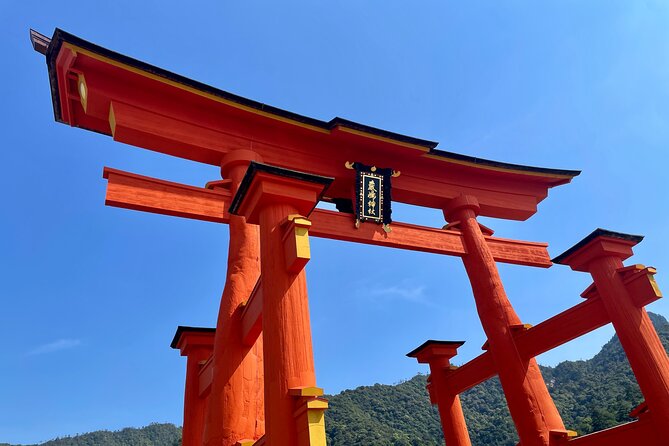
Most Hiroshima one-day plans feel like a checklist. This one tries to feel like a route through mood, starting on Miyajima, then moving to Hiroshima city. That order matters because the famous Torii Gate in front of Itsukushima Shrine does not sit the same way every time you arrive.
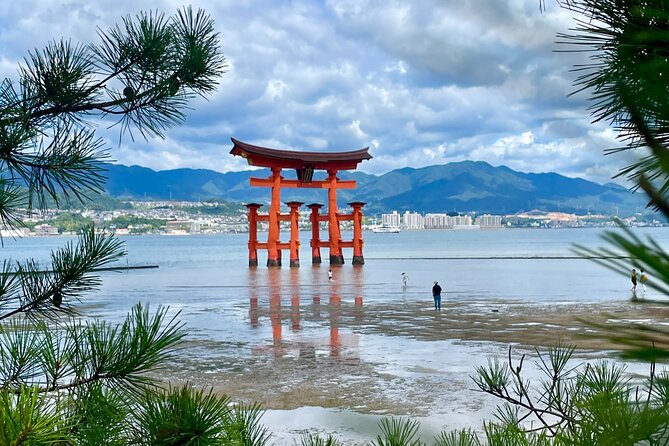
The tour can change the order between Miyajima and Peace Park, based on timing, so you have a better chance to see the Floating Torii Gate. In plain terms: when the tide is right, the gate appears to float on the sea. When it’s not, it can look more like a shoreline structure. Either way, you still get the shrine experience, but this adjustment is why the tour can feel more thoughtful than a fixed schedule.
Also, you are using public transportation and walking. That means you will feel the rhythm of the day, not just ride between stops. Wear comfortable shoes, because you will be on your feet more than you might expect from an itinerary that reads like short museum-and-views blocks.
More Miyajima tours:
- Peaceful Hiroshima & Miyajima UNESCO 1 Day Bus Tour
★ 5.0 · 5,309 reviews - Hiroshima: Hiroshima and Miyajima UNESCO Sites 1-Day Tour
★ 4.9 · 2,330 reviews - Hiroshima / Miyajima Full-day Private Tour with Government Licensed Guide
★ 5.0 · 1,298 reviews
Private guide pacing in Hiroshima and Miyajima (and why it matters)
This is a private tour, meaning it’s only your group, and the guide can customize the day around what you care about most. That flexibility is more than a nice-to-have. In Hiroshima, people often need time. In Miyajima, some people want temples, others want shopping street snacks, and others mainly want the shrine and views.
In feedback from past guests, guides like Yuka and Massa were praised for staying engaged and for being willing to answer questions. Another guide name that came up was Ally, with praise for conversational, thoughtful pacing. If you like to ask follow-up questions, this is the kind of tour that tends to handle them well.
A private setup also helps with pacing between heavy and lighter moments. You can spend more or less time at Peace Memorial Park depending on how you are feeling, and you can slow down at Miyajima if you want to enjoy the walkways and small details rather than rush to the next stop.
Miyajima island: Itsukushima Shrine, the Torii, and the mood shift
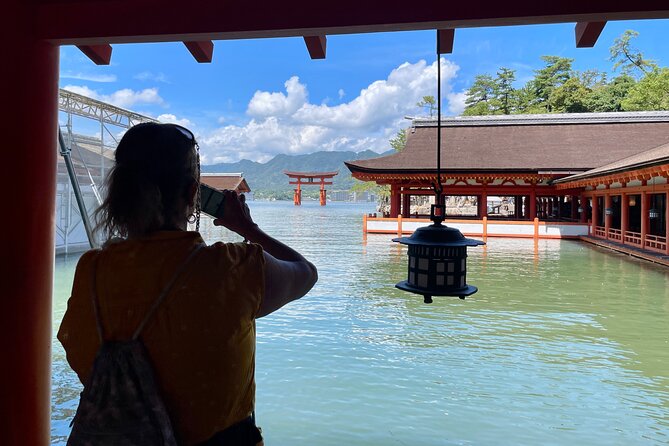
Your Miyajima portion is built around Itsukushima Shrine, a UNESCO-listed site with a long spiritual reputation. You start with the island approach, then you hit the shrine area, including the Torii Gate that floats depending on the tide.
What I like about this section is that it’s not just about a postcard view. The shrine complex is a national treasure, and you get time to take in the feeling of the place as you move through the grounds. Even if you don’t follow Shinto closely, you can still feel the difference between being on land and seeing the shrine setting framed by water and sea-level views.
The tour schedules a short stop for the Torii Gate area and then continues to time for the shrine itself. The important practical note is timing. The guide will encourage you to aim for high tide if possible, because that is what creates the classic floating effect. If you miss high tide, you still get the shrine, but your best photo might look different than what you expected.
You also get built-in time for temples and additional shrine-related spaces on the island, so the day does not feel like one big photo moment and then a sprint.
Daishoin Temple and Senjokaku: where the pace turns calmer
After the main shrine highlights, the route moves to two places that help broaden Miyajima beyond the headline view.
First is Daishoin Temple, described as Miyajima’s oldest temple with over 1,200 years of history. Even with only about 40 minutes, this stop can work well because it gives you a sense of the island’s longer religious layers. You are not just looking at one icon, you are seeing a more complex spiritual history.
Then you go to Senjokaku, also connected to the Itsukushima shrine world heritage setting. What makes this stop especially worthwhile is how it is described: large halls and wall-less spaces. That kind of layout often makes noise fade and helps your mind settle. It’s also tied to 16th-century building history, so it adds depth without requiring a long sit-down lesson.
Time is shorter here, around 15 minutes, so treat it like a pause button. Look around, notice the scale, and take a moment before you head toward the more lively shopping area.
A few more Hiroshima days worth comparing
- Hiroshima Historical Walking Tour – Why A-Bomb was Dropped
★ 4.8 · 893 reviews - Hiroshima Peace (Heiwa) Walking Tour at World Heritage Sites
★ 5.0 · 872 reviews - Hiroshima in a Nutshell: Morning Bike Adventure
★ 5.0 · 524 reviews - Hiroshima City 4hr Private Walking Tour with Licensed Guide
★ 5.0 · 437 reviews
Omotesando shopping street: your easy break for food and souvenirs
Miyajima’s Omotesando Shopping Street is one of those places where you can eat without planning a restaurant. You’ll have about an hour here, which is plenty time to snack and still keep moving.
This stop is useful because it gives you local rhythm. You can pick up Miyajima snacks and specialties like oysters, conger eel rice, and momiji manju (the maple leaf-shaped sweets people associate with the island). It also works well for souvenirs that feel specific to the place instead of generic travel stands.
Practical tip: if you want lunch, this is one of your best windows. The tour itself does not include lunch, so bring cash or card readiness and decide early whether you want to do snack-sized bites or a more filling meal.
Crossing to Hiroshima: ferry or train, and how fast you want to go
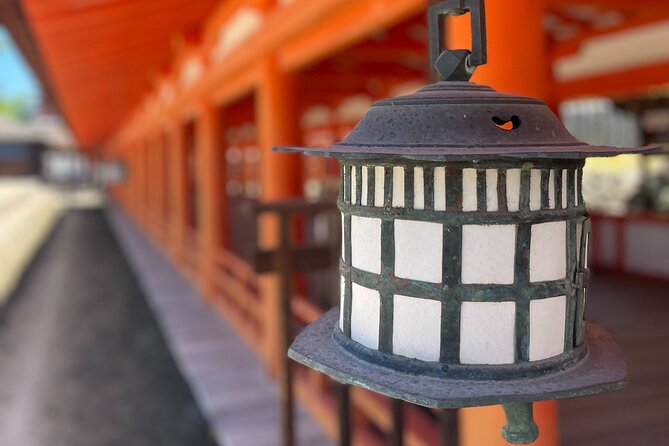
Once you finish on Miyajima, you head toward Hiroshima’s Peace Memorial area. The tour typically uses public transportation, and the transit portion is about an hour. There is also an option for a faster direct boat, described as roughly 45 minutes, though you would need to check the detail when you book.
Why does this matter? Because the emotional weight of the Hiroshima part is real. A quicker transfer may help if you want more time at the museum. A slower route can be better if you want a mental reset after Miyajima’s spiritual atmosphere.
Either way, you are moving by ferry and/or train routes, and the tour keeps the plan simple. Just remember that transportation costs are not included in the tour price. You’ll pay your own public transport fare.
Atomic Bomb Dome and Hypocenter Monument: seeing the markers in order
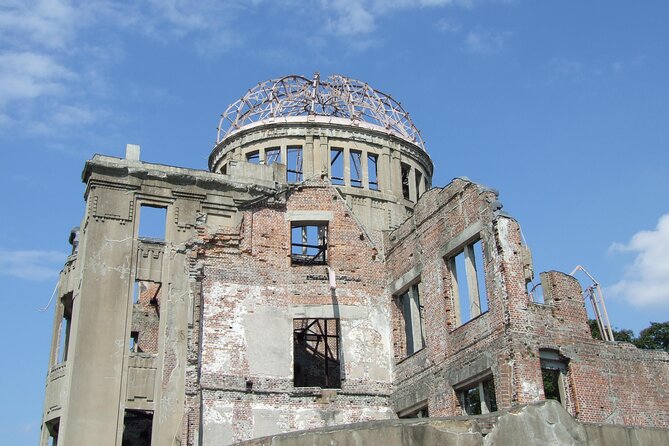
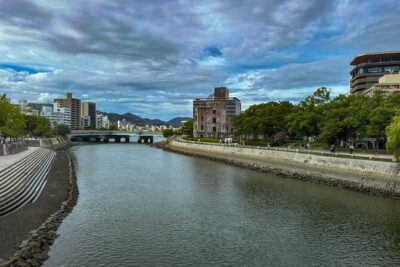
Your Hiroshima stops begin with the most internationally recognizable symbol: the Atomic Bomb Dome. You’ll have about 15 minutes here. That’s enough time to see it from a few angles, read whatever context signage you can, and settle your thoughts before moving on.
The next stop is the Hypocenter monument, about 15 minutes. This is the marker for where the atomic bomb exploded, described as 600 meters above a hospital. Even if you do not memorize every figure, the point of this stop is to connect the dome and surrounding city history to the precise location and scale of impact.
These two stops work best as a pair. The Dome gives you the visual memory. The Hypocenter monument gives you the spatial anchor. Together, they help you understand why Hiroshima is so careful with remembrance.
A good idea here is to pace yourself. Spend a minute or two simply standing still and looking, then let the guide’s explanation land. If you rush, it turns into another photo stop instead of a meaningful moment.
Peace Memorial Park and Hiroshima Peace Memorial Museum: facts plus human consequences

The route continues into Peace Memorial Park, with about 20 minutes for monuments and the general area. This is where you see a lot of memorial design language in one concentrated space: names, symbols, and messages that keep the history from becoming an abstract topic.
Then comes Hiroshima Peace Memorial Museum, around 1 hour and included in the tour price. The museum is described as showing photos and documents, including material that gives a glimpse into the reality of radiation exposure.
This museum stop is the key value here. If you only visit outdoor monuments, you get the public memory. If you add the museum, you get context. You also get a more direct explanation of what happened and what recovery has meant over time.
The guide is also part of what makes this section work. The tour description emphasizes personal stories and lived experience passed down through families, not just dates and lecture-style narration. In feedback, the guides were specifically praised for explaining why the bomb was dropped and for giving thought-provoking insight at the museum.
That is exactly what you want in Hiroshima. You need the facts, but you also need someone who can keep the tone respectful and clear while you process what you are seeing.
Children’s Peace Monument and the origami cranes
After the museum, the tour includes a shorter final memorial moment: Children’s Peace Monument, about 10 minutes. It references the tragic story connected to a girl named Sadako, and you can see many origami cranes.
This stop works as a tonal bridge. After museum images and park monuments, a compact, symbolic element helps you understand why the story lingers in so many forms. You’ll likely pause longer than 10 minutes if the place gets to you. The time allocation is short, but the experience is not shallow.
Tour price and what you get for $181.19 per person
At $181.19 per person, this is not the cheapest way to see Hiroshima and Miyajima. But it is also not trying to be. The real value is that it bundles a lot of the important parts into a private format, with included admissions and a guide who helps you make sense of what you are looking at.
Here’s what you do get in the tour price:
- Live local guide
- Pickup service from your Hiroshima hotel on foot
- Entrance fee included for Itsukushima Shrine and the Peace Memorial Museum
- Tour photo data
- Advance customization consultation
- Mobile ticket support
Here’s what is not included:
- Public transportation costs, listed as about ¥1,340 per person for basic travel
- Optional private transportation such as fast boats, direct boats, or taxis, with a wide cost range
- Lunch is not included
- Tips
So the math is simple. Your base price covers the guide and the main admissions. You pay transit separately because the tour uses public transportation, and the provider notes it is cheaper and due to Japanese regulation.
My practical advice: budget a bit extra for transit and decide your food plan early, ideally during the Miyajima shopping street hour. If you want a direct boat option later, confirm the added cost and whether it fits your schedule.
Also, the tour notes that it runs on a walking route and is not recommended if you cannot handle long walking days. In exchange, you get a more human pace instead of a bus-jammed sightseeing loop.
Who this tour suits best, and who might want a different plan
This tour is a strong fit if you want:
- A private day with a guide who can answer questions
- A careful Hiroshima route that includes the Peace Memorial Museum, not just outdoor sites
- A Miyajima visit that includes more than one iconic view, like Daishoin Temple and Senjokaku
It’s less ideal if you:
- Cannot walk long distances, because it’s a walking tour
- Need fully car-based transport, because transportation costs and routes depend on public transport or optional paid upgrades
- Are traveling when you are ill or have cold symptoms, since the tour requests you not participate in that case
If you like structure but also want room to linger, this balance tends to feel right.
Should you book this Hiroshima and Miyajima private tour?
Book it if you want a day that feels organized but not rushed, and you care about understanding what you are seeing in Hiroshima. The combination of Itsukushima Shrine timing, additional Miyajima sites like Daishoin Temple and Senjokaku, and the included Peace Memorial Museum gives you both atmosphere and context.
Skip it or rethink if you want a quick, low-walking “hit the highlights” day, or if the extra transit cost and walking time would stress you out. Also consider your tide expectations. The floating Torii depends on timing, and the tour tries to help by swapping the order, but nature runs the schedule.
If you do book, bring comfortable shoes, plan for transit costs, and consider eating during Miyajima’s Omotesando hour so you are not hunting for food later.
FAQ
Is pickup included?
Yes. The tour includes pickup on foot from your Hiroshima hotel area.
How long is the Hiroshima and Miyajima tour?
It runs about 7 hours.
What entrance fees are included?
The entrance fee for Hiroshima Peace Memorial Museum and Itsukushima Shrine is included.
Do I have to pay for transportation during the tour?
Yes. Public transportation is not included. The tour uses public transit, and you pay for it separately.
Is lunch included?
No. Lunch is not included.
Is this a private tour?
Yes. It is described as a private activity, and only your group participates.
Fresh options around Hiroshima
- Calligraphy Workshop at Traditional Folk Craft Shop in Hiroshima★ 5.0 · 26 reviews
- Hiroshima Peace Park & A-Bomb Dome Private Walking Tour (4 Hours)★ 5.0 · 26 reviews
- Hiroshima & Miyajima Island Private Tour: History & Culture★ 5.0 · 26 reviews
- Hiroshima History Tour : A-Bomb Dome, Peace Memorial & City★ 5.0 · 26 reviews
- Hiroshima: Hidden Gems and Highlights Private Walking Tour★ 4.8 · 27 reviews
- 4 Hour Private Hiroshima City Walking Tour★ 4.5 · 27 reviews
- Hiroshima:Guided Virtual Tour/PEACE PARK TOUR VR★ 5.0 · 29 reviews
- Hiroshima: Saijo Sake Tasting at 7 Breweries Guided Tour★ 4.8 · 29 reviews
Miyajima Tours, compared.
Peaceful Hiroshima & Miyajima UNESCO 1 Day Bus Tour
Read our review →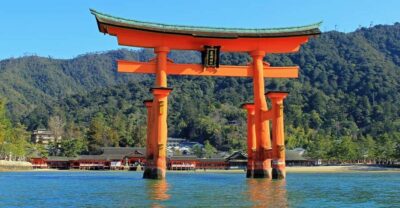
Hiroshima and Miyajima UNESCO Sites 1-Day Tour
Read our review →
Hiroshima / Miyajima Full-day Private Tour with Government Licensed Guide
Read our review →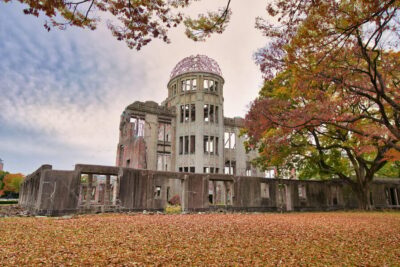
Osaka/Kyoto: Hiroshima Miyajima Bus Tour & Shinkansen Ticket
Read our review →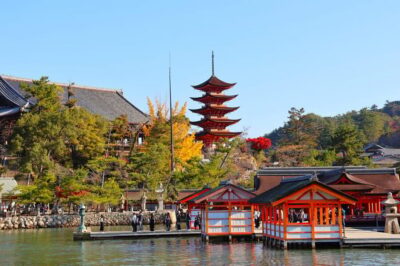
Hiroshima and Miyajima Day Trip with Itsukushima Shrine & Ferry
Read our review →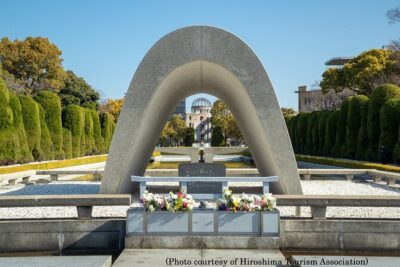
Full Day Hiroshima and Miyajima Bus Tour from Hiroshima
Read our review →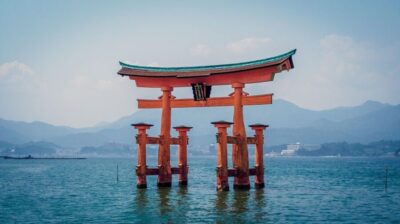
Miyajima Peace Memorial Icons of Peace and Beauty
Read our review →Browse the lists this tour appears in